Installing an AIO liquid cooler is one of the most common PC building tasks, but the process varies significantly by socket type, case orientation, and cooler brand. This guide covers the complete installation process for AMD AM5/AM4 and Intel LGA1851/LGA1700 — including pump orientation, fan direction, thermal paste application, and cable routing — with step-by-step instructions that apply to every AIO on this list.
| Spec | Arctic Liquid Freezer III Pro 360 A-RGB 9.5/10 | Lian Li Galahad II Trinity Performance 360 Unavailable 9.1/10 | Cooler Master MasterLiquid 360 Atmos 8.7/10 | Corsair iCUE Link Titan 360 RX RGB 8.8/10 | NZXT Kraken Elite 360 RGB 2024 Unavailable 8.5/10 |
|---|---|---|---|---|---|
| radiatorSize | 360mm (3x 120mm) | 360mm (3x 120mm) | 360mm (3x 120mm) | 360mm (3x 120mm) | 360mm (3x 120mm) |
| radiatorThickness | 38mm skived fins | 32mm double-wave fins | 27mm | 27mm | 30mm |
| pumpType | PWM pump with integrated VRM fan | Daisy-chainable LCP fans | Dual-chamber ARGB pump | FlowDrive pump with magnetic levitation | Custom turbine pump (+10% flow rate vs Gen1) |
| socketSupport | AM5, AM4, LGA1851, LGA1700 | AM5, AM4, LGA1851, LGA1700, LGA1200 | AM5, AM4, LGA1851, LGA1700, LGA1200 | AM5, AM4, LGA1851, LGA1700, LGA1200 | AM5, AM4, LGA1851, LGA1700, LGA1200 |
| fans | 3x P12 Pro PWM, max 2000 RPM | 3x 120mm LCP PWM ARGB | 3x 120mm Sickleflow Edge PWM | 3x RX120 RGB PWM (iCUE Link) | 3x F120 RGB Core PWM |
| warranty | 6 years | 6 years | 3 years | 5 years | 6 years |
| Rating | 9.5/10 | 9.1/10 | 8.7/10 | 8.8/10 | 8.5/10 |
Prices change daily — tap Check Price for the current Amazon price.
Prices change daily — tap Check Price for the current Amazon price.
Quick Picks
- Best value AIO to install: Arctic Liquid Freezer III Pro 360 A-RGB — $84 with a 38mm radiator and a 6-year warranty. The integrated VRM fan makes it the most thermally comprehensive AIO at this price.
- Best for windowed builds: Lian Li Galahad II Trinity Performance 360 — $169 with daisy-chain ARGB fans and a clean pump block. Note: LGA1851 bracket sold separately.
- Best LCD + display AIO: NZXT Kraken Elite 360 RGB 2024 — $279 with a 2.72-inch IPS LCD and the easiest software-driven monitoring on this list.
What You Need Before You Start
Tools
- Phillips head screwdriver (magnetic tip preferred)
- Zip ties or Velcro cable straps (at least 4-6)
- Isopropyl alcohol (90%+) and lint-free cloth or coffee filter — for cleaning the CPU IHS if reinstalling
- Thermal paste (included with all AIOs on this list; optional aftermarket: Arctic MX-6 is $8 and performs identically to premium options)
Socket Compatibility Check
Before opening the box, confirm your socket:
| Socket | CPUs | Bracket Included? |
|---|---|---|
| AM5 | Ryzen 7000, 8000, 9000 series | Yes (all AIOs on this list) |
| AM4 | Ryzen 3000–5000 series | Yes (all AIOs on this list) |
| LGA1851 | Intel Core Ultra 200 (Arrow Lake) | Yes — except Lian Li Galahad II (separate order) |
| LGA1700 | Intel 12th–14th Gen | Yes (all AIOs on this list) |
| LGA1200 | Intel 10th–11th Gen | Yes (Lian Li, Cooler Master, Corsair, NZXT only) |
Case Radiator Support
Check your case manual for radiator clearance. A 360mm AIO requires 3x 120mm fan slots in a row — standard in mid-tower and full-tower cases, but not universal. Common mount points:
- Top mount (recommended): Hot air exhausts directly out of the case. Best for overall system temps.
- Front mount: Pulls cool air over the radiator before it reaches the GPU. Best for GPU temps in dense builds.
- Rear mount: Only accommodates 120mm or 140mm AIOs — not suitable for 360mm coolers.
Step-by-Step Installation
Step 1: Prepare the Case
Remove the side panels and identify your radiator mounting location. If top-mounting, check whether your case has sufficient GPU clearance — some compact mid-towers restrict GPU length when a top-mounted 360mm radiator is present.
Remove any stock case fans from the mounting location you’ve chosen. Keep the screws; you’ll use them or the AIO-included screws to mount the radiator fans.
Step 2: Install the Backplate (AMD AM5/AM4)
AMD AM5 and AM4 motherboards use a plastic stock backplate. Most AIOs on this list replace this with a metal backplate for better clamping force.
- Remove the motherboard from the case if not yet installed (recommended for first-time builders — clearance is much easier).
- Route the backplate through the four holes behind the CPU socket.
- Thread the standoffs through from the front side and hand-tighten until snug. Do not overtighten — the standoffs should sit flush, not compressed into the PCB.
For the Corsair iCUE Link Titan 360 and NZXT Kraken Elite 360, the backplate is pre-assembled; you just thread it through and secure from the front.
The Arctic Liquid Freezer III Pro uses a different mechanism: metal mounting rails attach to the backplate standoffs first, and the pump block slides onto those rails. This is the most secure mounting system on the list but requires reading the manual carefully the first time.
Step 3: Install the Backplate (Intel LGA1851/LGA1700)
Intel LGA1851 (Arrow Lake) and LGA1700 (Alder/Raptor/Meteor Lake) both use the same 75mm x 75mm mounting hole spacing. Most AIOs ship with a single bracket that fits both sockets.
- Remove the plastic Intel retention frame from the motherboard (the black plastic piece surrounding the socket). Keep it — you’ll need it if you ever switch back to a stock cooler.
- Place the AIO backplate on the rear of the motherboard, aligning it with the four socket holes.
- Insert the mounting screws from the front, threading them into the backplate’s threaded posts.
- Hand-tighten in an X-pattern (top-left, bottom-right, top-right, bottom-left) to ensure even pressure.
Note on LGA1851: The Lian Li Galahad II Trinity Performance 360 requires a separately purchased LGA1851 mounting kit from Lian Li’s website. All other AIOs on this list include the LGA1851 bracket in the box.
Step 4: Apply Thermal Paste
All five AIOs on this list ship with pre-applied or included thermal paste. If this is a new installation, use the included paste — the performance difference between included paste and aftermarket compounds like Arctic MX-6 is under 1°C in real-world use.
If reinstalling over an existing CPU:
- Apply a small amount of isopropyl alcohol (90%+) to a lint-free cloth and wipe the CPU IHS in circular motions until clean.
- Wipe the pump base plate clean with the same method.
- Apply a pea-sized dot (approximately 4mm diameter) at the center of the IHS. The mounting pressure will spread it evenly.
Do not spread the paste manually — this introduces air bubbles and reduces thermal transfer.
For AMD Ryzen 9000/7000 series CPUs with a rectangular IHS, a small horizontal line (~8mm) slightly works better than a dot to cover the elongated die area.
Step 5: Mount the Pump Block
- Carefully lower the pump block onto the CPU socket, aligning the mounting holes with the standoffs or rails installed in Step 2-3.
- Thread the mounting screws in hand — again, use an X-pattern to ensure even seating.
- Tighten progressively in the same X-pattern. Stop when you feel firm resistance — overtightening cracks IHS surfaces and causes uneven paste spread.
Arctic Liquid Freezer III Pro specifics: The pump block clips onto the mounting rails and secures with two screws. The rails make it impossible to overtighten; tighten until the block no longer moves laterally.
NZXT Kraken Elite 360 specifics: The mounting system uses thumb screws — finger-tight is correct. NZXT’s design has built-in stops that prevent overtightening.
Step 6: Mount the Radiator and Fans
Decide your fan orientation before mounting:
- Fans as intake (pulling air through radiator into case): Warmer air goes into the case. Works for front-mount positions where the cooler air is outside.
- Fans as exhaust (pushing air through radiator out of case): Cooler external air contacts the radiator fins directly. Works best for top-mount positions.
Top mount = fans as exhaust (most common). With fans pushing air up and out of the top, the radiator sees the coolest air in the case first.
Front mount = fans as intake. Cool external air pulls through the front panel, passes through the radiator, and enters the case — which keeps the GPU cooler but raises case internal temps slightly.
To determine fan direction: most fans have an arrow molded into the frame indicating airflow direction and rotation direction. The airflow arrow should point toward the radiator if exhausting, or away from it if intaking.
- Attach the three fans to the radiator using the included screws. Standard 120mm screws work if the included screws are misplaced.
- Mount the assembled radiator-fan unit to the case using the case’s pre-threaded mounting holes. M3 screws are standard; longer screws are needed to go through the fan frame, radiator, and into the case.
Step 7: Connect Cables
Each AIO requires a minimum of these connections:
| Connection | Where it plugs in | Purpose |
|---|---|---|
| Pump head | CPU_FAN or AIO_PUMP header (check manual) | Powers and monitors the pump |
| Fan cables | SYS_FAN headers or hub | Controls fan speed |
| USB 2.0 internal | Internal USB 2.0 header on motherboard | Required for RGB and software control |
| ARGB header (if applicable) | ARGB 3-pin header | Optional: direct motherboard RGB control |
AIO-specific cable notes:
- Arctic Liquid Freezer III Pro: One pump cable (4-pin PWM) plus three fan cables (4-pin PWM each). No USB required for core function. Optional USB dongle if you want software RPM monitoring.
- Lian Li Galahad II Trinity Performance 360: Three LCP fan cables daisy-chain from the pump block to a single USB 2.0 header. Clean routing — one USB cable handles fans + pump ARGB.
- Corsair iCUE Link Titan 360: All three fans and the pump connect to the included iCUE Link hub via the proprietary Link cable. The hub connects to USB 2.0. This is the cleanest cable setup on the list.
- NZXT Kraken Elite 360: Three fan cables plus a pump header. The LCD display requires a USB 2.0 connection and the NZXT CAM application running on Windows or Linux.
Step 8: BIOS Configuration
After powering on, enter BIOS (typically Del or F2 at POST) and confirm the pump is detected:
- Navigate to Fan/Pump Control (varies by motherboard — common names: Q-Fan Control, Smart Fan 6, Fan Tuning).
- Set the CPU_FAN or AIO_PUMP header to Full Speed or Pump Mode. Pumps should not run at reduced RPM based on temperature — they are most efficient at constant speed.
- Set the radiator fans to a temperature-responsive curve. A common starting curve: 30% at 40°C, 50% at 60°C, 80% at 75°C, 100% at 85°C.
- Confirm your CPU temperature at idle. AM5 systems (Ryzen 9000 series) idle between 40-55°C depending on ambient temperature and background tasks — this is normal. LGA1851 systems (Core Ultra 200) idle at 35-50°C.
Step 9: Stress Test
Before closing the case:
- Run a short stress test to confirm mounting is secure and thermal paste spread is good: Cinebench 2024 multi-core for 10 minutes, or HWiNFO64 + Prime95 (Small FFTs) for 5 minutes.
- Monitor CPU package temperature. Expected ceiling temperatures:
- Arctic Liquid Freezer III Pro 360: 75-82°C on Ryzen 9950X (170W package power)
- Lian Li Galahad II Trinity 360: 77-83°C on Ryzen 9950X
- Cooler Master MasterLiquid 360 Atmos: 78-85°C on Ryzen 9950X
- Corsair Titan 360: 79-85°C on Ryzen 9950X
- NZXT Kraken Elite 360: 80-86°C on Ryzen 9950X (revised pump helps close gap)
- If temperatures exceed 95°C within the first 2 minutes, reseat the pump block — the thermal paste likely spread unevenly or the mount is loose.
Component Deep Dives
#1 — Arctic Liquid Freezer III Pro 360 A-RGB
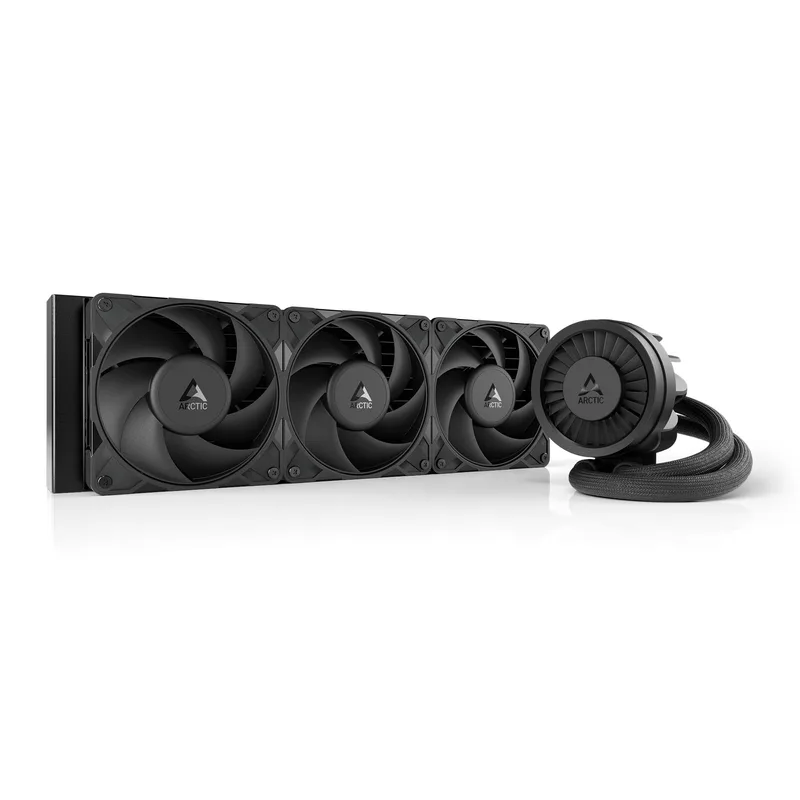
The Arctic Liquid Freezer III Pro 360 A-RGB is the clearest value proposition in the 360mm AIO market. At $84, it uses a 38mm-thick skived radiator — the same construction method found on premium $200+ coolers — combined with three P12 Pro PWM fans and an integrated VRM cooling fan that directs airflow directly at the motherboard’s power delivery components.
The integrated VRM fan is the most practical differentiator here. When running a Ryzen 9950X or Core Ultra 9 285K at sustained all-core loads, VRM temperatures directly impact stability and boost duration. The Arctic’s VRM fan measurably reduces power delivery temperatures compared to AIOs without it, according to user reports and third-party evaluations.
Installation is straightforward. Arctic uses a rail-and-clip system that prevents overtightening, which is useful for first-time builders. The only friction in setup is managing three individual fan cables — there is no daisy-chain or hub integration. Cable management takes slightly more effort than the Corsair or Lian Li options.
At $84 with a 6-year warranty covering all components, the Liquid Freezer III Pro 360 A-RGB is the default recommendation for anyone prioritizing cooling performance per dollar over aesthetics or software features.
#2 — Lian Li Galahad II Trinity Performance 360
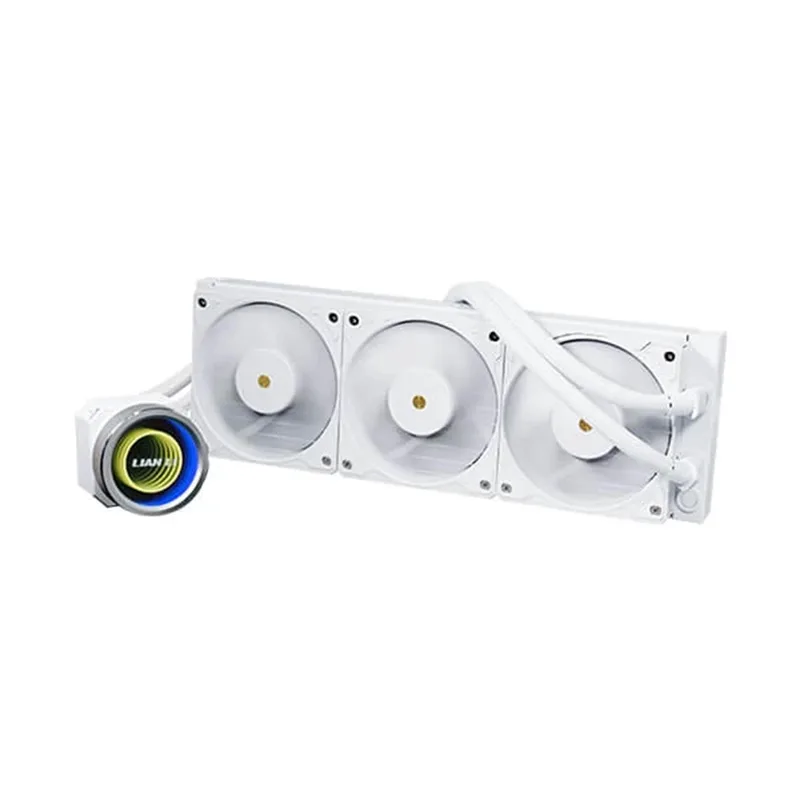
Lian Li Galahad II Trinity Performance 360
The Lian Li Galahad II Trinity Performance 360 sits at $169 — $70 more than the Arctic — and the premium is justified for two reasons: cleaner cable management and better RGB aesthetics.
The daisy-chain LCP fan system is genuinely better than running three separate fan cables to three separate headers. All three fans chain from the pump block and connect to a single USB 2.0 header, which leaves your 4-pin fan headers free for case fans and reduces visual clutter inside the build. This matters most in windowed cases where interior cleanliness is part of the build aesthetic.
Thermally, the Galahad II Trinity Performance 360 lands just below the Arctic in most evaluations — the 32mm radiator (vs Arctic’s 38mm) is the limiting factor at sustained high TDP. For CPUs below 200W package power, the difference is under 3°C. For heavy all-core workloads above 200W, the gap widens to 5-8°C.
The critical caveat for Arrow Lake builds: LGA1851 bracket is not included. Lian Li sells it separately. Order the bracket before you plan to build.
#3 — Cooler Master MasterLiquid 360 Atmos
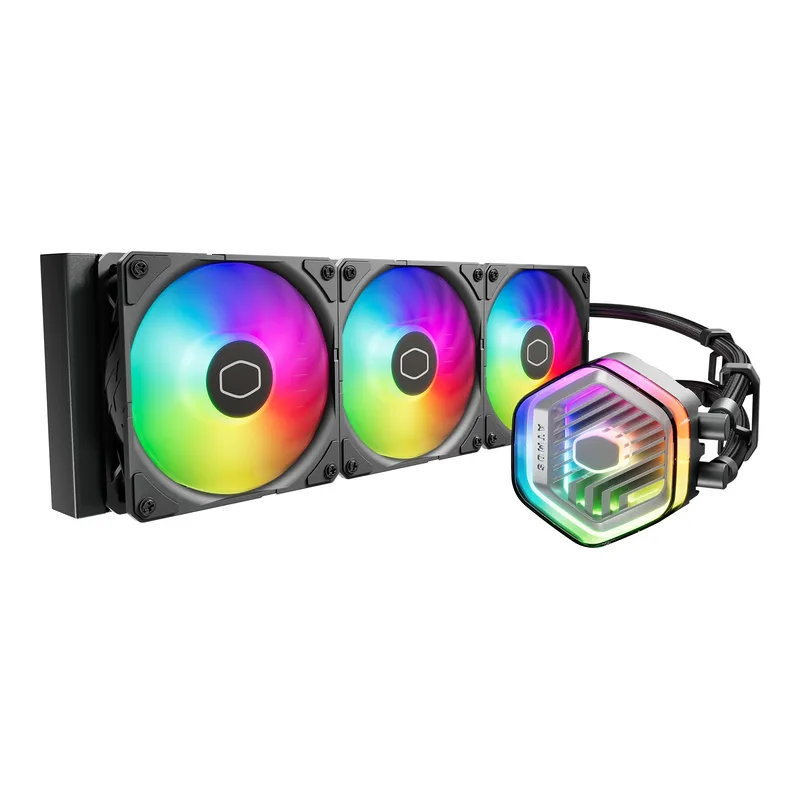
The Cooler Master MasterLiquid 360 Atmos targets the mid-range at $119, splitting the difference between the budget Arctic and the premium Lian Li. The dual-chamber pump design is the standout feature — by separating the hot and cold coolant paths inside the pump block, it reduces thermal saturation during long rendering or encoding sessions. The practical result is that temperature curves stay flatter during extended workloads compared to single-chamber designs.
The Sickleflow Edge fans add an outer ring around each blade to redirect tip vortex turbulence, reducing noise at equivalent airflow. In owner feedback comparisons, the Atmos fans are consistently rated quieter than standard Sickleflow at the same RPM setting.
The 27mm radiator is the main limitation. At sustained CPU loads above 200W (Ryzen 9950X all-core or Core Ultra 9 285K), both the Arctic and Lian Li outperform it by 5-10°C. For mid-range CPUs like the Ryzen 7 9700X or Core Ultra 7 265K that stay below 150W, the Atmos is fully capable.
The three-year warranty is shorter than competitors at this price tier — something worth noting given that pump failure is the most common AIO failure mode.
#4 — Corsair iCUE Link Titan 360 RX RGB
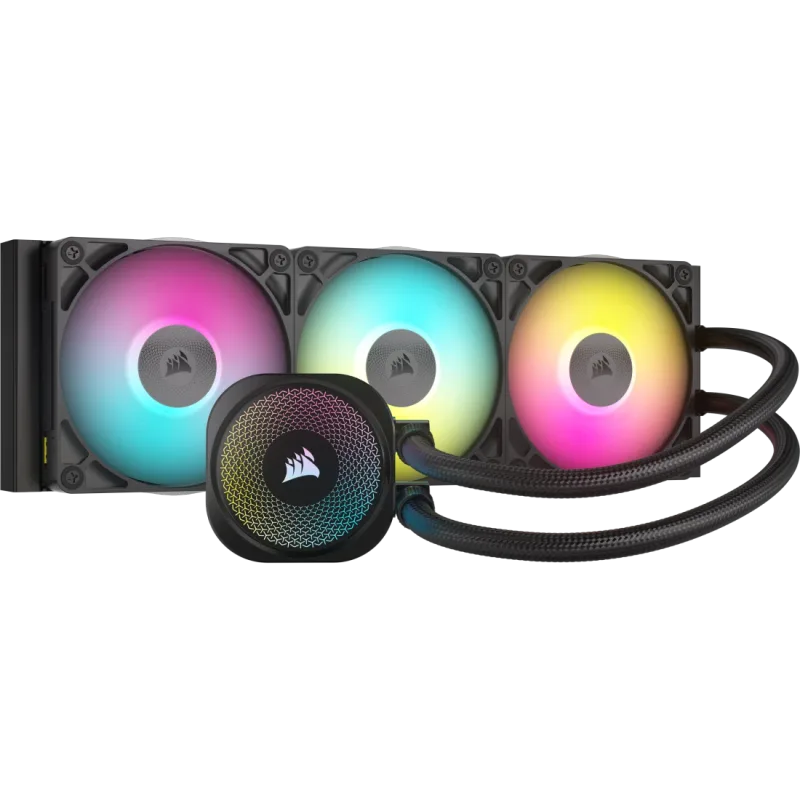
The Corsair iCUE Link Titan 360 RX RGB at $190 is the cable-management showpiece of this list. The iCUE Link ecosystem connects all three RX120 fans and the pump block through a single daisy-chain cable to the included iCUE Link hub, which connects to your PC via a single USB cable. The result is a cable situation that’s meaningfully cleaner than any conventional AIO — and the RX120 fans with 47 individually addressable LEDs each are among the brightest and most configurable RGB fans in the market.
The FlowDrive magnetic-levitation pump is legitimately silent at idle. Owner reports across multiple forums consistently cite it as the quietest pump experience on this list.
The thermal performance is competitive but not class-leading. At 27mm, the radiator is thinner than the Arctic and Lian Li. For CPUs with 200W+ package power, you will see the Titan 360 running 5-8°C warmer than the Freezer III Pro under sustained load. For typical gaming workloads that don’t sustain full all-core power, the thermal difference is minimal.
If you’re building into a windowed case and want the most polished RGB + cable management combination, the Corsair Titan 360 is the pick. If raw thermal performance is the priority, the Arctic at half the price is better.
#5 — NZXT Kraken Elite 360 RGB 2024
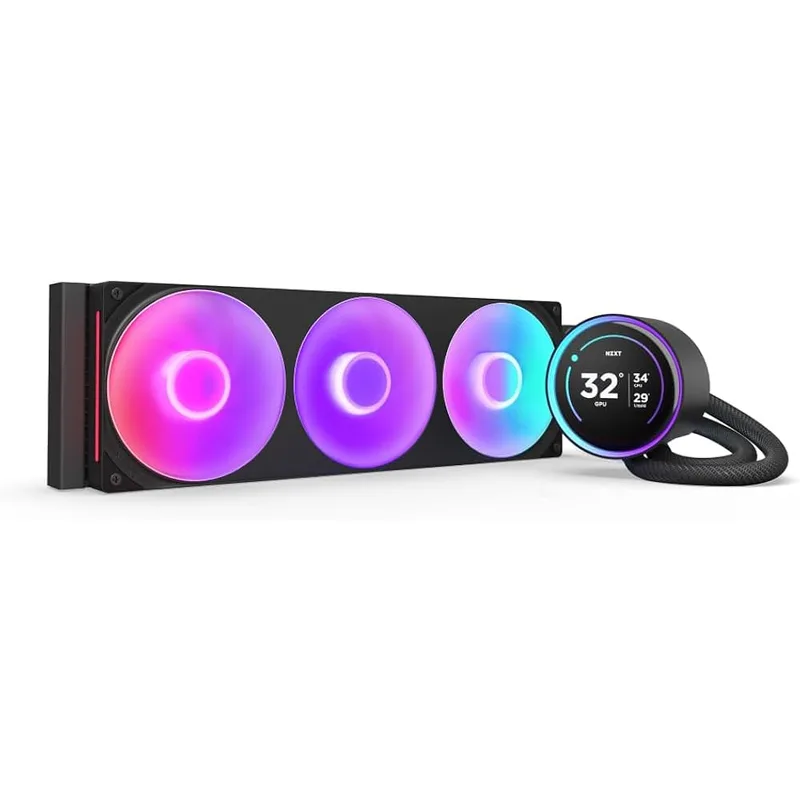
NZXT Kraken Elite 360 RGB 2024
The NZXT Kraken Elite 360 RGB 2024 at $279 is the most expensive AIO on this list, and the justification is entirely the 2.72-inch round IPS LCD display at 640x640 resolution. The display shows real-time CPU temperature, RPM, custom GIFs, system time, or static images — configurable through NZXT’s CAM software.
The 2024 model’s redesigned turbine pump increases coolant flow rate by 10% over the first-generation Kraken Elite, which closes the thermal gap to the Arctic by roughly 4°C compared to the original. Peak temperatures on a Ryzen 9950X land around 80-86°C at full load — competitive, but the Arctic still leads at this workload.
The six-year warranty and NZXT’s straightforward replacement process make this a reliable long-term investment if the display feature matters to you. CAM software is required to control the LCD, which adds a background service requirement. CAM has improved significantly in 2025-2026, but some users still report occasional CPU usage spikes — worth knowing before committing to the ecosystem.
At $279, the Kraken Elite 360 is a premium aesthetic purchase, not a performance buy. If you primarily want the best thermal result for the money, spend $84 on the Arctic. If you want a 2.72-inch LCD on your pump head and a clean NZXT aesthetic, the Kraken Elite is the only product in this price range that delivers it.
Build Tips
Orient the pump tubes correctly. Most AIO manufacturers recommend routing tubes downward from the radiator — this keeps air bubbles away from the pump and toward the radiator. However, some AIOs (including the Arctic Liquid Freezer III) work correctly in any orientation. Check your specific manual.
Pre-route cables before mounting the radiator. Once the radiator is bolted into the case, running USB cables from the pump block to the motherboard becomes significantly harder. Route first, secure second.
Don’t overtighten radiator screws. Radiator fins are aluminum and can compress and deform with excessive torque. Tighten until there is no movement — 0.5 Nm is sufficient for most aluminum radiators.
Confirm pump RPM in software before closing the case. A stopped pump is silent and will look like normal operation until CPU temperatures spike within 60 seconds of load. Check HWiNFO64 or your BIOS for pump speed before buttoning up.
Check for radiator fan clearance with RAM. In top-mount configurations on some ATX motherboards, the fan frame closest to the rear of the case can overhang tall RGB RAM heatspreaders. Measure before committing to the mount direction.
Performance Expectations
Based on manufacturer specifications and third-party evaluations, here are temperature ranges for common CPUs under sustained all-core workload (Cinebench 2024 multi, 10 minute run):
| CPU | TDP | Arctic Freezer III Pro 360 | Lian Li Galahad II 360 | Cooler Master Atmos 360 |
|---|---|---|---|---|
| AMD Ryzen 7 9700X | 105W | 68-72°C | 70-74°C | 71-76°C |
| AMD Ryzen 9 9950X | 170W | 75-82°C | 77-83°C | 80-86°C |
| Intel Core Ultra 7 265K | 125W | 65-70°C | 67-72°C | 69-74°C |
| Intel Core Ultra 9 285K | 253W | 85-90°C | 88-92°C | 91-96°C |
For the Core Ultra 9 285K at 253W, all 360mm AIOs run near thermal limits — this CPU benefits most from the Arctic’s 38mm radiator thickness. At lower TDPs, any AIO on this list provides comfortable headroom.
Upgrade Path
If you’re installing a 360mm AIO now and considering future upgrades:
- RAM, GPU, or storage first — AIO coolers don’t bottleneck gaming or content creation. Upgrade components before revisiting cooling.
- Reseat thermal paste at 3-4 years — AIO thermal paste (which uses the CPU’s IHS, not the AIO) degrades over time. A $6 tube of Arctic MX-6 applied every 3-4 years maintains original installation temperatures.
- Fan replacement before pump replacement — Fans are the most common failure point in AIOs and are universally replaceable with standard 120mm fans. The pump block is typically sealed and non-serviceable.
- When to replace the AIO — If pump noise increases significantly or CPU temperatures rise 10°C+ at identical workloads compared to the first year of use, the pump is degrading. Most well-built AIOs last 5-7 years under normal operating conditions.
FAQ
Q: Should I mount my AIO radiator at the top or front of the case?
Top-mount is the standard recommendation for most builds. With the radiator at the top and fans set to exhaust, hot air from the radiator exits the case immediately without re-entering the system. Front-mount works well if your GPU runs hot and you want the radiator fans pulling cool external air — but it typically raises overall system temperatures by 2-5°C compared to top-exhaust.
Q: Does it matter which way the fans face on the radiator?
Yes. For top-mounted radiators with fans exhausting upward, the fans should push air through the radiator from inside the case out. For front-mounted radiators with fans intaking from outside, the fans should pull air through the radiator from outside into the case. Check the directional arrow molded into each fan frame.
Q: How much thermal paste should I apply?
A pea-sized dot (approximately 4mm diameter) at the center of the CPU IHS. The clamping pressure from mounting the pump block will spread it across the die area. For AMD’s rectangular Zen 5 IHS (Ryzen 9000 series), a short horizontal line (~8mm) across the center ensures coverage of the elongated die footprint.
Q: My CPU temperatures seem high after installing the AIO — what should I check?
Check in this order: (1) Confirm pump RPM is above 1500 RPM in BIOS or HWiNFO64 — a stopped pump produces very high temperatures within 60 seconds. (2) Confirm the pump block is mounted flat and all screws are evenly tightened. (3) Reseat with fresh thermal paste if temperatures remain above 95°C at moderate load. (4) Check that radiator fan direction is correct.
Q: Can I reuse thermal paste from a new AIO on a new CPU?
Not typically. Thermal paste adheres to the CPU IHS and pump base plate. When you remove the AIO, the paste smears and introduces air pockets. Always clean both surfaces with isopropyl alcohol (90%+) and apply fresh paste when remounting — even if you’re remounting the same AIO.
The Bottom Line
Installing a 360mm AIO is a 30-45 minute process once you have the right tools and understand the socket-specific steps. The most common mistakes — overtightening the mount, incorrect fan direction, and failing to confirm pump RPM — are all preventable with the steps above.
For the best cooling result at the lowest cost, the Arctic Liquid Freezer III Pro 360 A-RGB is the default pick: $84, 38mm radiator, integrated VRM fan, and a 6-year warranty that exceeds every competitor in this price range. If your build is windowed and clean cable routing matters, the Lian Li Galahad II Trinity Performance 360 at $169 is the next step up — just order the LGA1851 bracket separately if you’re on Arrow Lake.